1. Vue3 新特性
Vue3 的一些特性:
- 渐进式开发,兼容 Vue2 的特性
- 性能的提升
- 打包减少 41%
- 初次渲染快 55%
- 更新快 133%
- 内存占用 54%
- Composition API 合集,解决组件开发问题
- 新的 API 的加入
- Teleport 瞬移组件
- Suspense 解决异步组件加载问题
- 更好的 Typescript 支持
2 脚手架工具
使用 vue-cli 创建项目后,vscode 的 prettier 可能与 eslint 存在冲突,需要手动设置。具体表现在使用 ctrl+shift+f 进行格式化时,会采用全局 prettier 规则,而在 ctrl+s 时会采用项目的 eslint 规则,对文件进行格式化。
在全局的 prettier 规则中 trailingComma 默认设置为 es5 即在多行的数组、对象的每一项的末尾都添加 ,。然而在项目内的 eslint 读取的 @vue/prettier 插件规则中,该项被设置为 none,因此需要手动将规则设置为与全局的规则一致,具体修改方案:
1
2
3
4
5
6
7
8
9
10
11
12
13
14
15
16
17
18
19
| // .eslintrc.js
module.exports = {
root: true,
env: {
node: true,
},
extends: [
"plugin:vue/vue3-essential",
// ... ...
],
parserOptions: {
ecmaVersion: 2020,
},
rules: {
"no-console": process.env.NODE_ENV
"no-debugger": process.env.NODE_ENV
+ "prettier/prettier": ["warn", { trailingComma: "es5" }],
},
};
|
3. 创建一个 Vue 实例
在 Vue3 中,创建一个实例与 Vue2 有着很大的差别。在 Vue2 中创建实例我们通常使用 new 关键字,来直接创建一个 Vue 实例:
1
2
3
| <div id="app">
{{ message }}
</div>
|
1
2
3
4
5
6
| var app = new Vue({
el: '#app',
data: {
message: 'Hello Vue!'
}
})
|
然而在 Vue3 中,引入了新的 api Vue.createApp() 来创建 Vue 实例:
1
2
3
| <div id="counter">
Counter: {{ counter }}
</div>
|
1
2
3
4
5
6
7
8
9
| const Counter = {
data() {
return {
counter: 0
}
}
}
Vue.createApp(Counter).mount('#counter')
|
4. setup
https://vue3js.cn/docs/zh/api/composition-api.html#setup
一个组件选项,在创建组件之前执行,一旦 props 被解析,并作为组合式 API 的入口点
4.1 ref
在创建 Vue3 组件实例时新增了一个 setup 属性,该属性应当传入一个方法,通过该属性,可以简化我们之前需要同时编写 data 与 methods 属性来执行某些操作。
同时也新增了 ref 方法,接受一个内部值并返回一个响应式且可变的 ref 对象。创建的 ref 对象必须使用 refObj.value 的方式去写入值:
1
2
3
4
5
6
7
8
9
10
11
12
13
14
15
16
17
18
19
20
21
22
23
24
25
26
27
28
29
30
31
32
33
34
35
36
37
38
| <template>
<div>
<h2>欢迎光临红浪漫洗浴中心</h2>
<div>请选择一位美女为你服务</div>
</div>
<div>
<button
v-for="(item, index) in girls"
v-bind:key="index"
@click="selectGirlFun(index)"
>
{{ index }} : {{ item }}
</button>
</div>
<div>你选择了【{{ selectGirl }}】为你服务</div>
</template>
<script lang="ts">
import { defineComponent, ref } from "vue";
export default defineComponent({
name: "App",
setup() {
const girls = ref(["大脚", "刘英", "晓红"]);
const selectGirl = ref("");
// 由于函数无需转为 “响应式” 对象,因此无需使用 ref 进行转化
const selectGirlFun = (index: number) => {
selectGirl.value = girls.value[index];
};
return {
girls,
selectGirl,
selectGirlFun,
};
},
});
</script>
|
从这里可以看出 vue3 与 ReactHook 有一定的相似之处,ref 创建值相当于 ReactHook 中使用 useState 创建 State 对象;
同时在 setup 中直接编写的函数方法可以在 template 中直接调用,也与 ReactHook 中写入编写的方法可以直接在 jsx 中调用有相似之处。
4.2 reactive
在上面的代码中,每次创建值都需要使用 ref 同时写入值时也需要使用 refObj.value 来改写;为了避免上面的繁琐操作,可以使用 reactive 来简化操作。
reactive 可以返回对象的响应式副本,可以简单理解为传入的属性都会被转化为“响应式”的,相当于将传入的所有属性都使用 ref() 去生成一个响应式且可变的 ref 对象(待商榷):
1
2
3
4
5
6
7
8
9
10
11
12
13
| const girls = ref(["大脚", "刘英", "晓红"]);
const selectGirl = ref("");
const selectGirlFun = (index: number) => {
selectGirl.value = girls.value[index];
};
return {
girls,
selectGirl,
selectGirlFun,
}
|
相当于:
1
2
3
4
5
6
7
8
9
| const data = reactive({
girls: ["大脚", "刘英", "晓红"],
selectGirl: "",
selectGirlFun: (index: number) => {
data.selectGirl = data.girls[index];
},
});
return data
|
但是当我们在 setup 中返回可响应数据对象时,如果使用展开运算符,如:
那么得到的数据是将是一组不可变的,原因是因为 reactive 返回的是一个响应式对象,而展运算符会破坏这种结构。
这时可以使用 toRefs。toRefs 可以用来为源响应式对象上的 property 性创建一个 ref,然后可以将 ref 传递出去,从而保持对其源 property 的响应式连接。
借助这个特性,我们就可以获取一个 ToRefs 对象,这个对象的所有 property 都连接到了原始对象,因此:
1
2
3
4
5
6
7
8
9
| const data = reactive({
});
const refData = toRefs(data);
return {
...refData
}
|
相当于:
1
2
3
4
5
| const data = reactive({
});
return data
|
5 生命周期
5.1 在 setup 中使用生命周期
vue2 中有以下生命周期:

在 vue3 中,如果使用了 setup(),那么 setup() 会在 beforeCreate 与 created 之前执行。
如果要在 setup() 中使用生命周期可以从 vue 中导出 onXXX 的方法,在 setup() 中调用:
1
2
3
4
5
6
7
8
9
10
11
12
13
14
15
16
17
| import { onBeforeMount, onMounted, reactive, toRefs } from "vue";
export default {
name: "Demo02",
setup() {
const data: DataProps = reactive({
});
onBeforeMount(() => {
console.log("onBeforeMount");
});
return data;
},
};
|
5.2 Vue3 的生命周期执行顺序
在 Vue3 中,Vue2 老的生命周期钩子函数仍然可以使用,但是他们都稍晚于 Vue2 中在 setup() 中执行的生命周期钩子:
1
2
3
4
5
6
7
8
9
10
11
12
13
14
15
16
17
18
19
20
21
22
23
24
25
26
27
28
29
30
| export default {
name: "Demo02",
setup() {
console.log("setup()");
const data: DataProps = reactive({
});
onBeforeMount(() => {
console.log("onBeforeMount");
});
onMounted(() => {
console.log("onMounted");
});
return data;
},
beforeCreate() {
console.log("beforeCreate");
},
beforeMount() {
console.log("beforeMount");
},
mounted() {
console.log("mounted");
},
};
|
输出:
1
2
3
4
5
6
7
| setup()
beforeCreate
created
onBeforeMount
beforeMount
onMounted
mounted
|
Vue3 中没有 onBeforeCreate() 与 beforeCreated 生命周期钩子
5.3 新增的生命周期函数
Vue3 新增了 onRenderTracked 与 onRenderTriggered 生命周期钩子,可以用于调试。
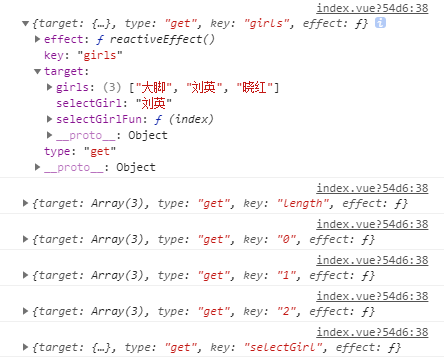
onRenderTracked() 状态跟踪函数,会跟踪每个值的变动,其内部传递的回调函数存在一个 event 参数,可以获取到监听结果:
1
2
3
4
5
6
7
8
9
10
11
12
13
14
15
16
17
18
| setup() {
const data: DataProps = reactive({
girls: ["大脚", "刘英", "晓红"],
selectGirl: "",
selectGirlFun: (index: number) => {
data.selectGirl = data.girls[index];
},
});
const refData = toRefs(data);
onRenderTracked(e => {
console.log(e);
});
return {
...refData,
};
},
|
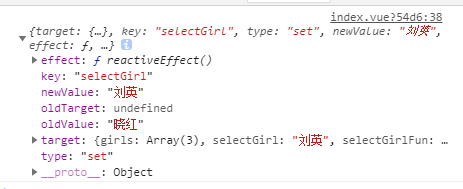
onRenderTriggered() 状态触发函数,当组件内的值改变时,会触发该函数,对外传递的 event 会显示改变值的索引以及 oldValue 与 newValue:
1
2
3
4
5
6
7
8
9
10
11
12
13
14
15
16
17
18
19
| setup() {
const data: DataProps = reactive({
girls: ["大脚", "刘英", "晓红"],
selectGirl: "",
selectGirlFun: (index: number) => {
data.selectGirl = data.girls[index];
},
});
const refData = toRefs(data);
onRenderTriggered(e => {
console.log(e);
});
return {
...refData,
};
},
|
当 selectGirl 发生改变时:
6. Watch 监听
在 Vue3 中,setup() 函数内可以使用 watch() 方法来设置监听:
1
2
3
4
5
6
7
8
9
10
11
12
13
14
15
16
17
18
19
20
| export default {
name: "Demo02",
setup() {
const overText = ref("红浪漫");
const overAction = () => {
overText.value = "点餐完成|" + overText.value;
};
watch(overText, (newValue, oldValue) => {
console.log(`new ----> ${newValue}`);
console.log(`old ----> ${oldValue}`);
document.title = newValue;
});
return {
overText,
overAction,
};
},
}
|
watch 方法的第一个参数可以传入一个 Ref 对象,也可以传入一个以来数组。但是要注意的是,监听的对象只能是 getter/effect 函数、ref 对象、reactive 对象或者一个数组。如果我们想要监听 reactive 中转化的值的话,由于其进行过转化,取值时其就是一个值类型,因此必须将其转化为一个 “getter 函数”,如 () => variable,举例来说:
1
2
3
4
5
6
7
8
9
10
11
12
13
14
15
16
17
18
19
20
21
22
23
24
| setup() {
const data: DataProps = reactive({
girls: ["大脚", "刘英", "晓红"],
selectGirl: "",
});
const refData = toRefs(data);
const overText = ref("红浪漫");
watch([overText, () => data.selectGirl], (newValue, oldValue) => {
console.log("newValue: ", newValue);
console.log("oldValue: ", oldValue);
document.title = newValue[0];
});
return {
...refData,
overText,
overAction,
};
},
|
Vue2 的 watch 用法同样适用于 Vue3 且无需任何特殊处理:
1
2
3
4
5
6
7
8
9
10
11
12
13
14
15
16
17
18
19
20
21
22
23
24
25
26
27
28
29
30
31
32
| export default {
name: "Demo02",
setup() {
const data: DataProps = reactive({
girls: ["大脚", "刘英", "晓红"],
selectGirl: "",
});
const refData = toRefs(data);
const overText = ref("红浪漫");
watch([overText, () => data.selectGirl], (newValue, oldValue) => {
console.log("newValue: ", newValue);
console.log("oldValue: ", oldValue);
document.title = newValue[0];
});
return {
...refData,
overText,
};
},
watch: {
overText(newVal: any) {
console.log("newVal: ", newVal);
},
selectGirl(newVal: any) {
console.log("newVal: ", newVal);
},
},
};
|
6. 自定义 hook
与 React 相似的,Vue3 中也可以使用自定义 Hook,将逻辑代码剥离出组件。
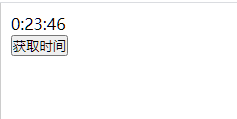
以下的示例是演示如何抽离出一个获取当前时间的组件:
1
2
3
4
5
6
7
8
9
10
11
12
13
14
15
|
import { ref } from "vue";
const nowTime = ref("00:00:00");
const getNowTime = () => {
const now = new Date();
const hour = now.getHours();
const min = now.getMinutes();
const sec = now.getSeconds();
nowTime.value = `${hour}:${min}:${sec}`;
setTimeout(getNowTime, 1000);
};
export { nowTime, getNowTime };
|
1
2
3
4
5
6
7
8
9
10
11
12
13
14
15
16
17
18
19
20
21
22
23
| // Demo03.vue
<template>
<div>
<div>{{ nowTime }}</div>
<button @click="getNowTime">获取时间</button>
</div>
</template>
<script lang="ts">
import { nowTime, getNowTime } from "./hooks/useNowTime";
export default {
name: "Demo03",
setup() {
return {
nowTime,
getNowTime,
};
},
};
</script>
<style lang="scss" scoped></style>
|
当然,我们完全可以模仿 react hook 的写法,将 useHook 文件导出一个方法:
1
2
3
4
5
6
7
8
9
10
11
12
13
14
15
16
17
18
19
|
import { ref } from "vue";
const useNowTime = () => {
const nowTime = ref("00:00:00");
const getNowTime = () => {
const now = new Date();
const hour = now.getHours();
const min = now.getMinutes();
const sec = now.getSeconds();
nowTime.value = `${hour}:${min}:${sec}`;
setTimeout(getNowTime, 1000);
};
return { nowTime, getNowTime };
};
export default useNowTime;
|
1
2
3
4
5
6
7
8
9
10
11
12
13
14
15
16
17
18
19
20
21
22
23
24
25
| // Demo03.vue
<template>
<div>
<div>{{ nowTime }}</div>
<button @click="getNowTime">获取时间</button>
</div>
</template>
<script lang="ts">
import useNowTime from "./hooks/useNowTime";
export default {
name: "Demo03",
setup() {
const { nowTime, getNowTime } = useNowTime();
return {
nowTime,
getNowTime,
};
},
};
</script>
<style lang="scss" scoped></style>
|
7. Teleport
Teleport 被称为瞬间移动组件,是 Vue3 新增的组件。它可以更便捷的将组件的 Dom 节点挂载到目标节点中,这对于我们写一些全局组件非常有用,比如 Alert、Modal、Notification 组件。
以 Modal 组件为例,我们会将 Modal 组件的 Wrapper 设置为相对定位,让其覆盖整个屏幕,写法如下:
1
2
3
4
5
6
7
8
9
10
11
12
13
14
15
16
17
18
19
20
21
22
23
24
25
26
27
28
29
30
31
32
33
34
35
36
37
38
| // Modal.vue
<template>
<div class="modal">
<div class="modal-content center">
<h2>EsunR.xyz</h2>
</div>
</div>
</template>
<script lang="ts">
export default {
name: "",
setup() {
return {};
},
};
</script>
<style lang="scss" scoped>
.modal {
width: 100%;
height: 100%;
position: absolute;
background-color: rgba(0, 0, 0, 0.5);
left: 0;
top: 0;
.center {
width: 200px;
height: 200px;
border: 2px solid #000000;
background: #ffffff;
left: 50%;
top: 50%;
transform: translate(-50%, -50%);
position: absolute;
}
}
</style>
|
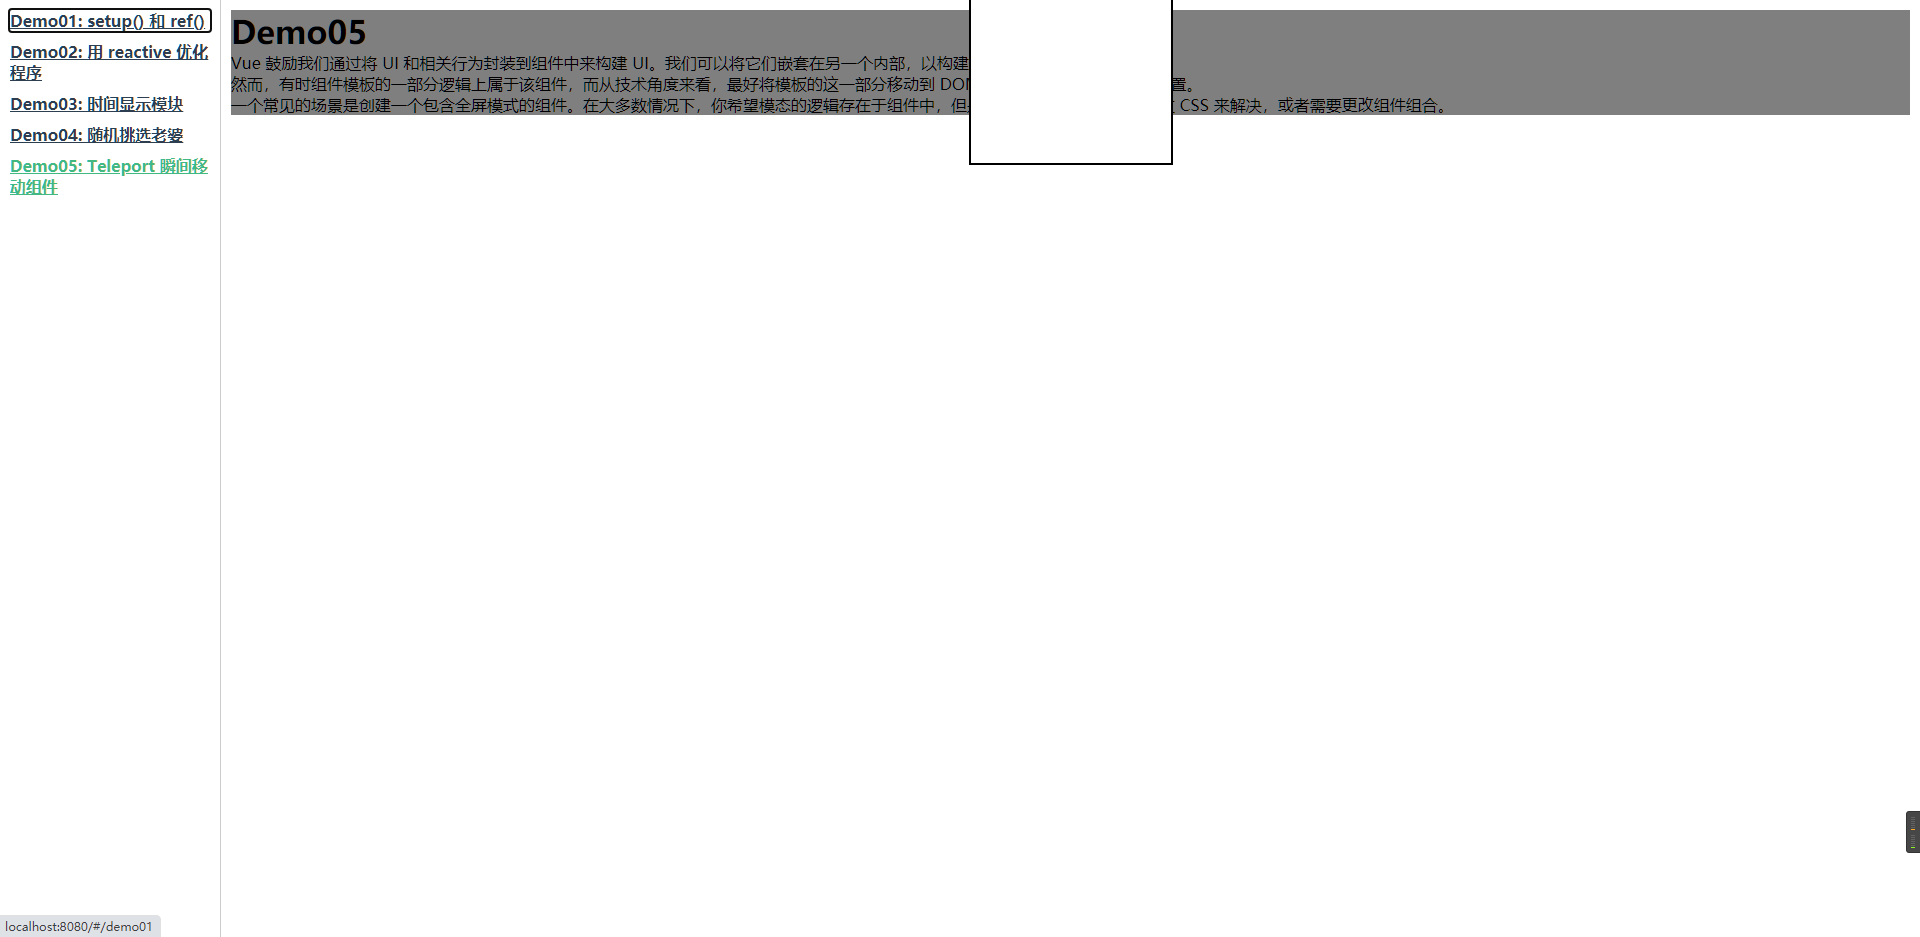
然而当页面逐渐复杂,我们在页面中使用这个组件时,组件会被挂载到调用的位置时,如果父级 Dom 节点的样式设置了定位,那么就会对 Modal 组件的定位产生影响,如:
1
2
3
4
5
6
7
8
9
10
11
12
13
14
15
16
17
18
19
20
21
22
23
24
25
26
27
28
29
30
31
32
33
34
35
36
37
38
| <template>
<div id="Demo05">
<Modal />
<h1>Demo05</h1>
<p>
Vue 鼓励我们通过将 UI 和相关行为封装到组件中来构建
UI。我们可以将它们嵌套在另一个内部,以构建一个组成应用程序 UI 的树。
</p>
<p>
然而,有时组件模板的一部分逻辑上属于该组件,而从技术角度来看,最好将模板的这一部分移动到
DOM 中 Vue app 之外的其他位置。
</p>
<p>
一个常见的场景是创建一个包含全屏模式的组件。在大多数情况下,你希望模态的逻辑存在于组件中,但是模态的定位很快就很难通过
CSS 来解决,或者需要更改组件组合。
</p>
</div>
</template>
<script lang="ts">
import Modal from "./components/Modal.vue";
export default {
name: "Demo05",
components: {
Modal,
},
setup() {
return {};
},
};
</script>
<style lang="scss" scoped>
#Demo05 {
position: relative;
}
</style>
|
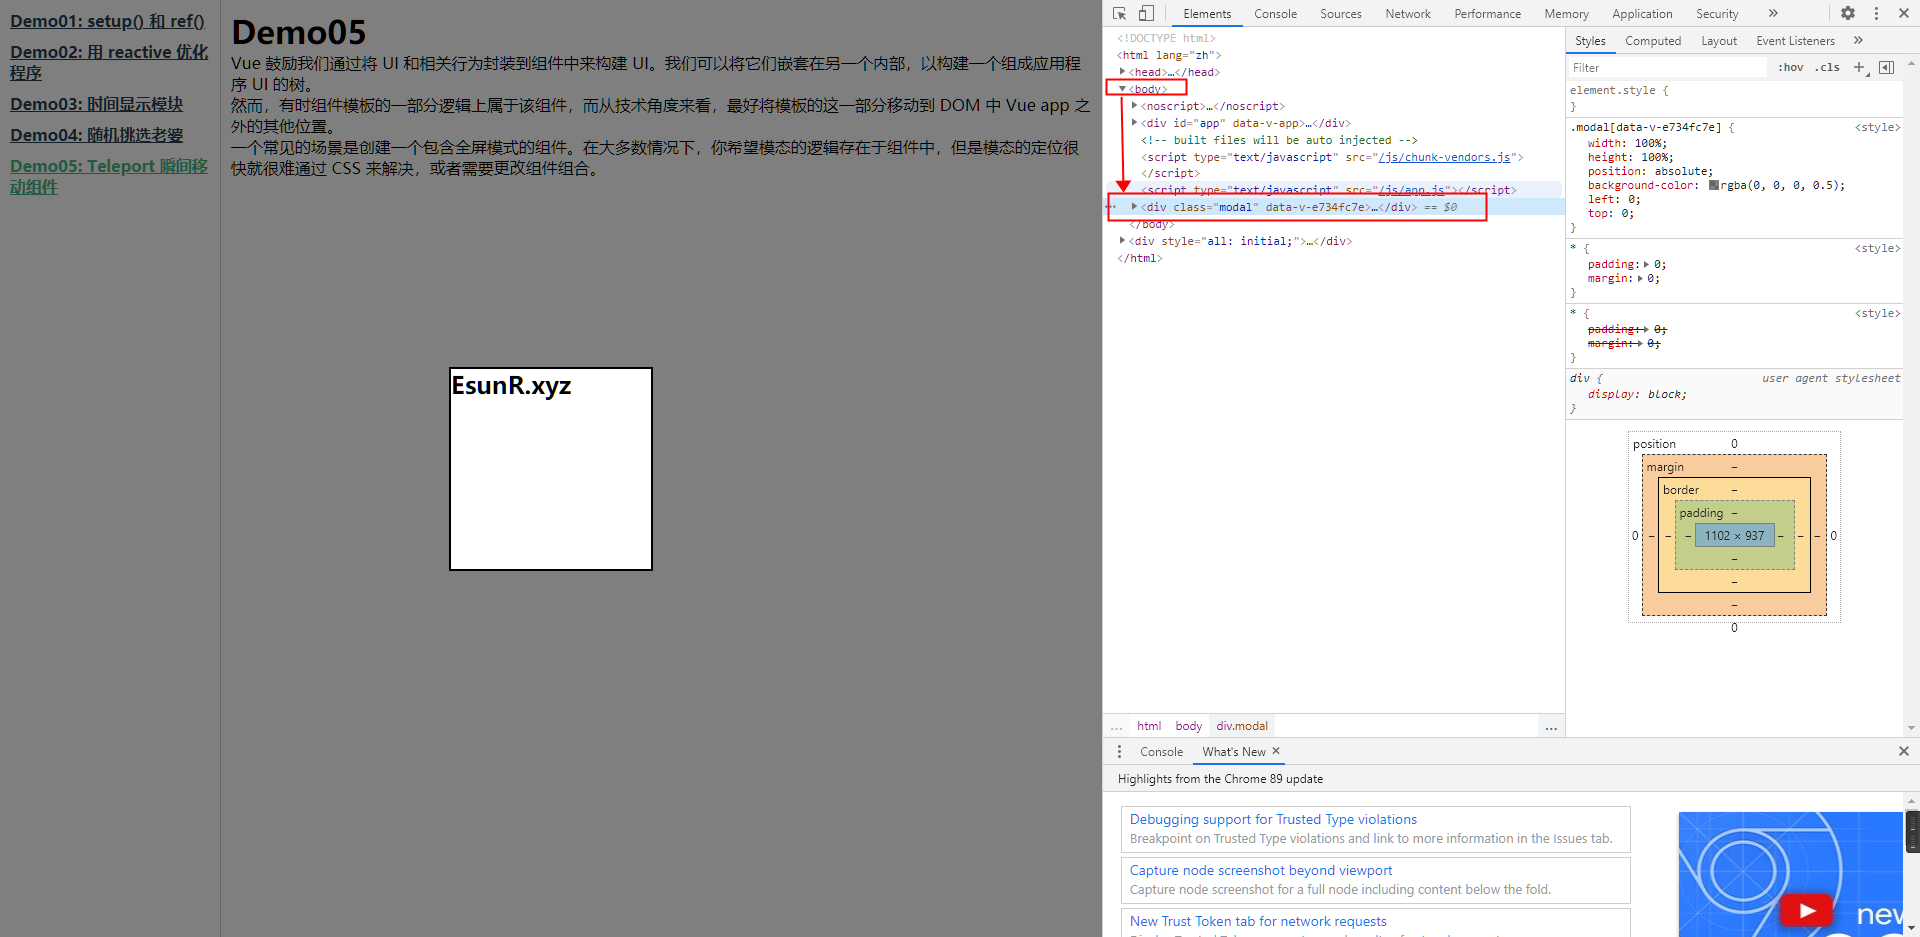
此时页面会表现为:
Dom 节点结构为:
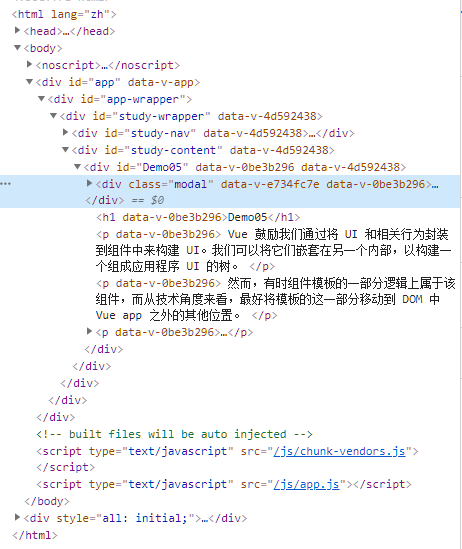
要解决这个问题,我们就必须要想办法把 Modal 组件移出去。在 Vue2 中,我们可以通过渲染函数来将渲染内容指定渲染在 HTML 的任意目标位置,其核心是在生成虚拟 DOM 后对其进行 targetDom.appendChild(virtualDom) 操作。
在 Vue3 中,我们可以直接使用 Teleport 组件来将组件渲染到页面的指定位置,因此我们只需要更改我们的 Modal 组件为:
1
2
3
4
5
6
7
8
9
| <template>
<teleport to="body">
<div class="modal">
<div class="modal-content center">
<h2>EsunR.xyz</h2>
</div>
</div>
</teleport>
</template>
|
此时 Modal 组件表现完全正常,因为其直接挂载到了 body 节点中:
8. Suspense
Suspense 是 vue3 中新增的组件,类似于 keep-alive 不需要任何的引入,可以直接进行使用。自带两个 slot 分别为 default、fallback。顾名思义,当要加载的组件不满足状态时,Suspense 将回退到 fallback状态一直到加载的组件满足条件,才会进行渲染。
在官方示例中,Suspense 与 异步组件(defineAsyncComponent) 配合使用的。当异步组件加载时可以为用户显示一个 loading 界面,如:
1
2
3
4
5
6
7
8
9
10
11
12
| <template>
<div>
<Suspense>
<template #default>
<AsyncComponent />
</template>
<template #fallback>
<h2>Loading... ...</h2>
</template>
</Suspense>
</div>
</template>
|
其实除了使用 defineAsyncComponent 声明的异步组件外,组件的 setup() 函数如果是一个 async 函数的话,该组件也属于一个异步组件,也可以使用 Suspense 来显示组件:
1
2
3
4
5
6
7
8
9
10
11
12
13
14
15
16
17
18
19
20
21
22
23
24
25
| // AsyncShow.vue
// 获取图片的异步组件
<template>
<div class="async-show">
<h2>Result: {{ result }}</h2>
<img :src="result && result.imgurl" alt="" width="600" />
</div>
</template>
<script lang="ts">
import { defineComponent } from "vue";
import axios from "axios";
export default defineComponent({
name: "AsyncShow",
async setup() {
const rawData = await axios.get("/api/api.php?return=json");
return {
result: rawData.data,
};
},
});
</script>
<style lang="scss" scoped></style>
|
1
2
3
4
5
6
7
8
9
10
11
12
13
14
15
| // index.vue
// 引入 AsyncShow.vue
<template>
<div id="Demo06">
<h1>Demo06</h1>
<Suspense>
<template #default>
<AsyncShow />
</template>
<template #fallback>
<h2>Loading... ...</h2>
</template>
</Suspense>
</div>
</template>
|
如果异步组件加载失败,可以使用 onErrorCaptured 来捕获:
1
2
3
4
5
6
7
8
9
10
11
12
13
14
15
16
| // index.vue
<script lang="ts">
import { onErrorCaptured } from "vue";
export default {
// ... ...
setup() {
onErrorCaptured(error => {
// 捕获异常
console.log(error);
return true;
});
return {};
},
};
</script>
|
